My sister asked me to contribute some stuff to her son's arts and crafts stall and I said yes and then thought oh crap that means more than one or two pieces. So I sat down for an afternoon and here's what I came up with.


Showing posts with label Jewellery. Show all posts
Showing posts with label Jewellery. Show all posts
Monday, 12 May 2014

Tuesday, 1 April 2014
Washer Pendants..Or Bob Meets A Lady!
When I took the following pictures I had used a lint roller and I swear I couldn't see anything but the camera sees all. Apparently that 10 pounds it adds is made entirely out of fluff!.
If you want to know how to make glitter pendants you can see my tutorial here, lint free.

No amount of phot editing was going to help in fact it just got worse and worse!


However the most exciting new in the craft room is that Bob got himself a lady, Betty.

Don't they make a lovely couple, Bob all big and manly, while Betty is sweet in her fluffiness.
They're going to be together for a very long time, now I have to stop talking crap and get moving I have so much happening here at the moment and it has to be done before Easter. Just to make things fun the kids finish school for 2 weeks on Friday, which means I shall be on a blogging break, except for WYPW because honestly 2 weeks home with the kids, I will be the one needing a few laughs. I will be changing the wifi password until their
Thanks for reading,
Mel xo
Thursday, 13 March 2014
Dangle Hoops Earrings
Hey Guys,
So I have been playing around with my seed beads, love them! They're cheap but look so pretty and bright. Wanna make some?

Supplies:
Fish Hook Earring Findings
Jump Rings in asst sizes
Charms
Round Hoop Earring Findings
Seed Beads
Bead Mat
Jewellery Making Pliers
So these are pretty simple but a little time consuming open the hoop and start threading your beads.
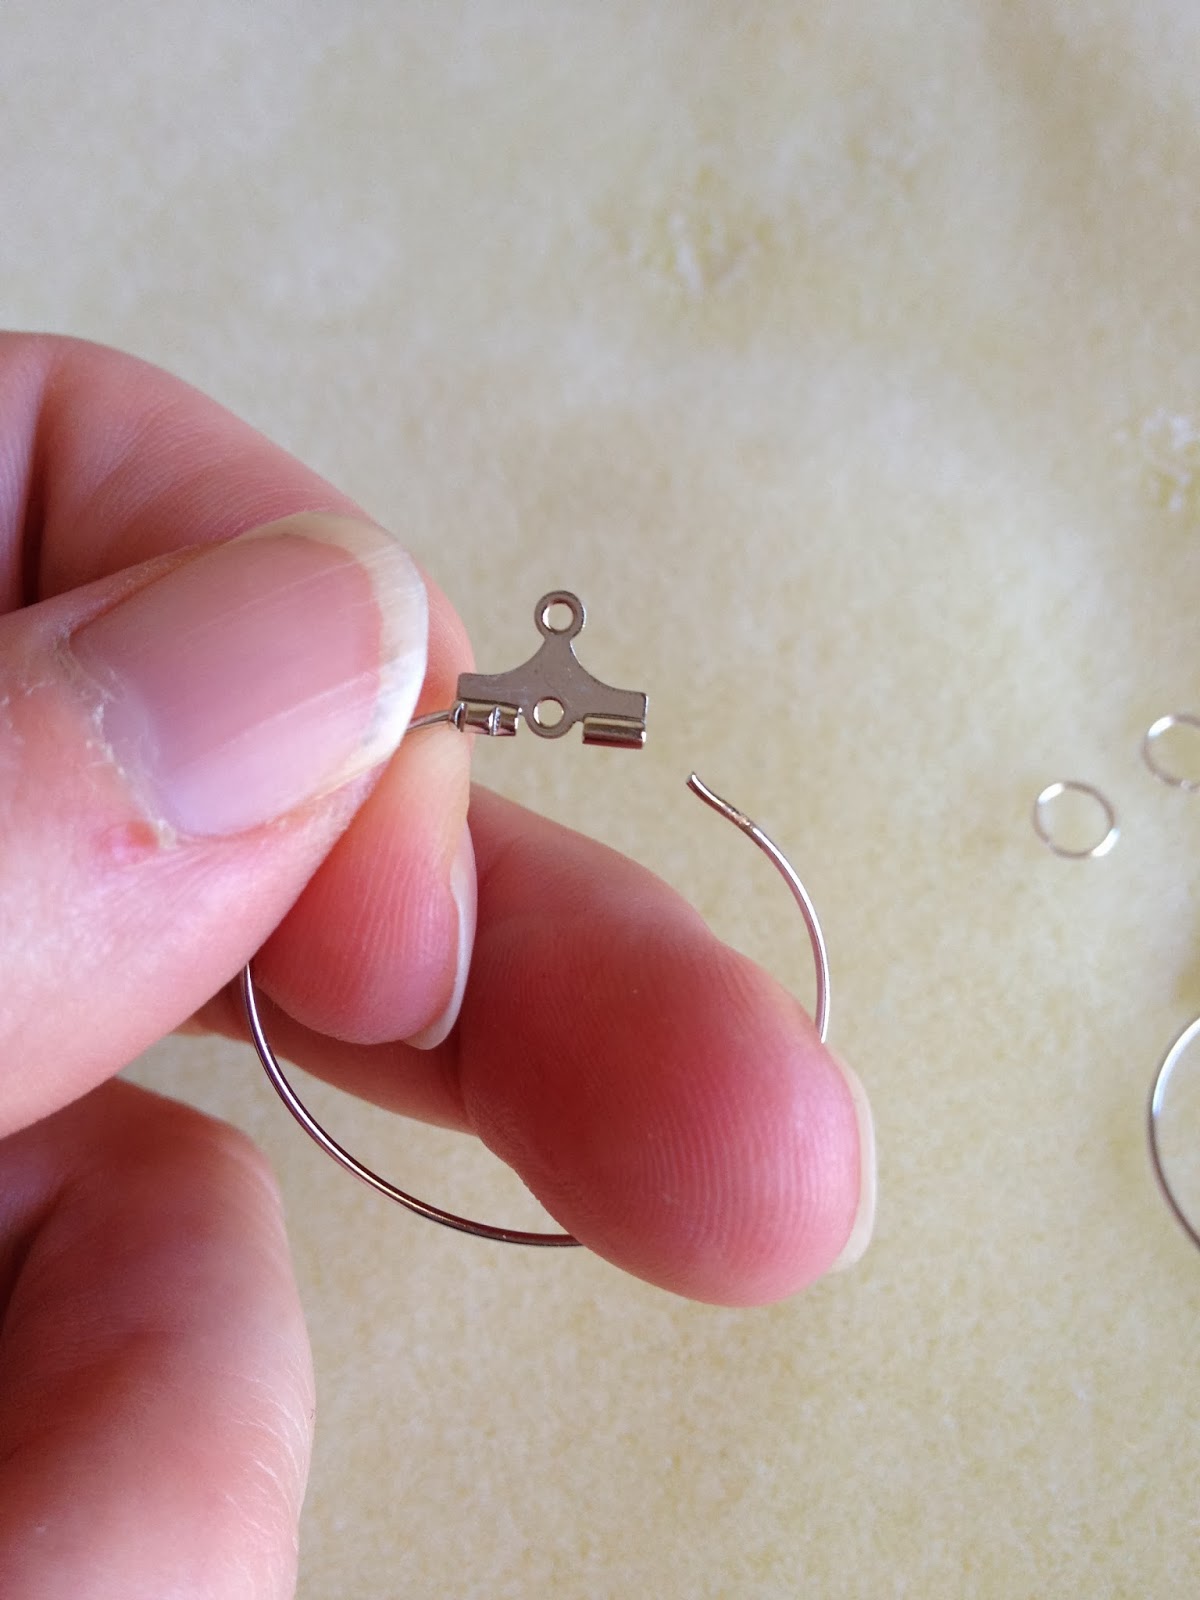
It pop as many as you like on, I like to have a bit of the silver showing, no other reason than I like the look and then close it over. I use my pliers to shut the hoop to make sure it has a strong hold.

Using the larger jump ring add the charm to the middle. Mind my manky thumb I have been knee deep in paint and sanding and if, the hands aren't covered in paint they're covered in scrapes and bangs from moving this crap all around the house.

Add the fish hooks using the other jump ring and your done.

Then you repeat until you have all your favourite colours sorted.

DIY Delight or Disaster? Well I was only going to make one pair on a bit of a whim and ended up making about 6 pairs in different colours, I'm going to have to go with Delight!
Thanks for reading,
Mel xo
Get everything you need to start making awesome bling here!
Linking here
Thursday, 6 March 2014
No Glue Washer Pendants - 10 Minutes And You're Done!!
No Glue Washer Pendants, yes please!

So after I made the tiles and thought I was such genius in the world I had the scraps. I hate wasting the leftovers and as I was packing them away I spotted the washers and thought hmm and so I made 8 washer pendants in around 20 minutes. So actaully 10 minutes per pendant is a lie it's much quicker than that.
Here are my scraps from yesterday (go here if you need to know how I made these)

Cut to size

Stick it on and trim the excess with an exacto knife.

Use up all the scraps.

DIY Delight or Disaster? Well aside from how quick they were to make you can't tell the difference between them and the ones using modpodge and dimensional magic. Absolutely a delight!
Wednesday, 11 December 2013
Name Bracelet
Is it vain that I have a stack of stuff with my name on it? Well here is one more which I am totally loving right now. I think they would make a beautiful gift for the upcoming holiday season.

Wednesday, 4 December 2013
Glitter Gem Choker - Or it was time for a disaster!

Well I guess I was due a disaster! I'm not overly happy with these.
Thursday, 14 November 2013
The Candy Cane Bracelet

Last year I went a little crazy with my "Silly Season" accessories. Like this one, but this year I wanted to keep it a little more subtle. Also if you aren't from here the Silly Season is what we call the lead up to the holidays, Summer starts, School ends and it is party town all over the country.
Tuesday, 22 October 2013
DIY Mood / Colour Change Rings
Are you ready to do the hippy hippy shake and get all groovy??
Well these mood rings will get you in the mood!

These are so much fun to make and seriously so simple! I found some colour change nail polish for a couple of bucks at the reject shop (think dollar store my northern hemisphere friends) and thought it would make for some groovy bling.

You'll need (just click the link for any of the items (Amazon Affliate Link)


Paint the ring blanks with the nail polish, I did two coats.

Pour the Dimensional Magic in and I set it in polystyrene to rest flat while it dried.

And you're done, how crazy simple is that, I wanted to show you how they looked after the colour change so I heated up a rice pack. You can see a dramatic change in the pinky purple one but the blue/green is very subtle change. Obviously Elizabeth was more impressed with the Pink/Purple change.

DIY Delight or Disaster? Oh it's a Delight, so simple to make and they really did work, I was worried the dimensional magic might affect the outcome but it was perfect. I used to love mood rings as a kid, then I saw the movie My Girl (you know Macaulay Culkin) and now they make me cry a little but these are pretty groovy man!
Thanks for reading,
Mel xo
B
Thursday, 27 June 2013
A Brush with Bling


It's a fact, we ladies are born with a love a bling, from glitter to fake jewels to rocking engagement rings, we all want a little sparkle in our life. Elizabeth is no exception.
We have a little issue with things going missing in our house, and Elizabeth's brush was one of those items. The boys borrow and never return anything, so I said I would get her a brush that they wouldn't want to be seen in public with. She looked a little skeptical but, god bless her, she said ok.
I looked at personalized ones and really $10 for a name on a brush...I don't think so. So I bought a $2 brush and was going to vinyl her name on it, then I thought the boys could peel that so I decided to bling it baby!!

Here's How
1. Gather Supplies:
- A brush with a flat back
- Flat back gems
- Bead Glue
- Cabochon
- A Crayon
2. Glue the Cabochon on
3. Spread the glue, do it section by section so it doesn't dry. I used the tip of the crayon to pick up the gems there is no way you can do this with your hand and a gem pick up tool is $15...seriously the crayon works, so don't buy one!!
Then let her dry

DIY Delight or Disaster? Bling, Hello Kitty, not to mention a super happy eleven year old and apart from the brush, I had all this on hand so it only cost me $2 to make.....Delight!!! One small issue, Madeleine is also not immune to bling and she keeps taking off with it, looks like I will be making a second one soon.
Thanks for reading,
Mel xo
Be Delighted Every Day, Follow Mellywood's Mansion!
|
|
|
|
|


Friday, 31 May 2013
Glitter Washer Earrings

Remember my glitter bracelet? Well using the same idea I made a set of matching earrings. Loving them!
I pretty much followed my Bracelet tutorial but only made one hole per washer and added the earring findings.
I love them like my bracelet so DIY delight for sure.
Thanks for reading,
Mel xo
Tuesday, 21 May 2013
Glitter Washer Bracelet

G'day,
Well if you spend a bit of time over here at the mansion you know that I love me a bottle cap but recently I have been all about the washer.
When I found these little babies around $2 for 50 I had to bring them home, where they sat for a few weeks before I decided what to do with them. Want to make one?

Supplies
- Small washers
- Glitter
- Glue
- Hole punch
- Jewelry Supplies

Shake off the glitter

Join them together with jump rings and add a clasp, mine was slightly small so I added a little chain just to extend it. Now you might notice the little mask charm, Nat over at Northshore Days often adds charms to her pieces and I love it so I added one as well, I think it just gives it a little bit of personality. It makes me think of fancy masquerade balls.
DIY Delight or disaster? Delight I think it's sweet.
Edited : I have had a few people ask how I made the holes I made them using this tool.
Be Delighted Every Day, Follow Mellywood's Mansion!
|
|
|
|
|
Mel xo

Saturday, 2 March 2013
Scrap Busting Saturday - Washer Pendant

Morning All,
After my glitter pendants, I thought I would have a go at the paper versions, using scraps and a couple of extra washers I had.
I followed the same method as my glitter pendants. I had planned to do a scrap buster project once a week but hey it's March and I'm up to my second scrap busting post, so you can see I'm really on a roll here.
Seriously in love with the washers now, I think I need an intervention!
Thanks for reading
Mel xo
Subscribe to:
Posts (Atom)
