Adsense


Showing posts with label Trash Chic. Show all posts

Tuesday, 18 November 2014

Roadside Stool Makeover

Hey Guys,

So things have been bouncing along here at the mansion. I haven't had much time for anything although IU have managed to score a few amazing items, which I hope to get poictures of very soon. In the mean time here is a guest post you might have missed during the year.

This post first appeared on The Thrifty Rebel


Sometimes I think my neighbours know I am going to take their roadside trash. You see I found five of these wooden stools on my neighbours front lawn ready for pick up. 

Instead of just being thrown on like the rest of the crap these were neatly tied together making it easy to carry 2  at a time. When I asked if I could have them, he smiled like he had been waiting for me and said of course.


I only needed two of them for my craft room so I gave them a couple of coats of chalk paint. They need something else, I was thinking grain sack, but for the life of me I could not get them to line up and it was peeling the paint. So I left them white until further inspiration hits and the paint cures


Then Tuula invited me to play,  inspiration hit and I got the paint out again, TADA pink seats, but even better that, the stools inspired something else that caused my very mild mannered husband Jules to freak out!!

and if you're new here I have already posted the makeover that had my husband wondering whether or not he was living in the Barbie Dream House here.

Thanks for reading

Mel xo

Monday, 15 September 2014

Memo Board

Hey Guys,

So I have banned myself from buying anything more from the thrift stores and op shops until I use all the items I have. You might remember this one from a gazillion posts ago but it is one huge frame.

Wednesday, 10 September 2014

DIY 3 tier stand

Howdy all,

So back in June my Mum took Elizabeth and I out for high tea, Have to say it was a really great day. If you're in Melbourne go and checkout the new Emporium and visit The Tea Salon it was lovely.

Anyway we are sitting there having a wonderful tea and my Mum says "Look at those holders, they're just old plates, someone drilled a hole in and put them together."


Thursday, 21 August 2014

Upcycled Blanket to Girls Jacket

Morning All or Afternoon depending on when and where you are reading this.

So I have been a busy little bee on the sewing machine and decided to upcycle the the blanket I thrifted a while back. Wow I loved it so much that I must make it again!

Monday, 26 May 2014

Look What My Thrifting Fairy Godmother Found For Me #2

My Thrifting Fairy Godmother was with me again this month and she has been kind very, very kind!

First I got this blanket $2 it's polar fleece and I plan on making a jacket for Madeleine out of it, I love polka dots.

Monday, 19 May 2014

Potty Reward Jar - For Boys

Hey Guys,

My goodness it has been busy, busy busy, around here. We have entered what I like to refer to as birthday season where 3/4 of the family have birthdays and we seem to do nothing but eat cake.

I am officially another year older and I keep waiting for that promised wisdom but some how I still do some pretty dumb things. Like decide to toilet train Max as we come into Winter!

Monday, 5 May 2014

DIY Tea Light Holder

You know what I love about crafty people? The way they love to share ideas. This little ripper came from a woman I met at a craft market.

So I was wondering around and out of the corner of my eye I spot a Big Shot out on a table. Of course if you're a regular around the mansion you will know that my Big Shot is my number one crafting tool. I LOVE IT! 

How much do I love it? Well if the house was on fire the kid smart enough to be holding the Big Shot would be on my first to save list!

Anyway, I got to talking with the woman, who really needs to start a blog, and we were talking about the things we've done with our Big Shots. It was like meeting a kindred spirit, we spoent almost an hour chatting. Anyway she told me of these tea lights she made and I asked her if I made it, she would mind if I shared it on my blog. Yay she said yes.

Supplies,
Foil (like the BBQ trays) ( i had a couple of precut squares left over from the computer cupboard)
Big Shot - you can get one here
Super Glue
Tea-Light Candle


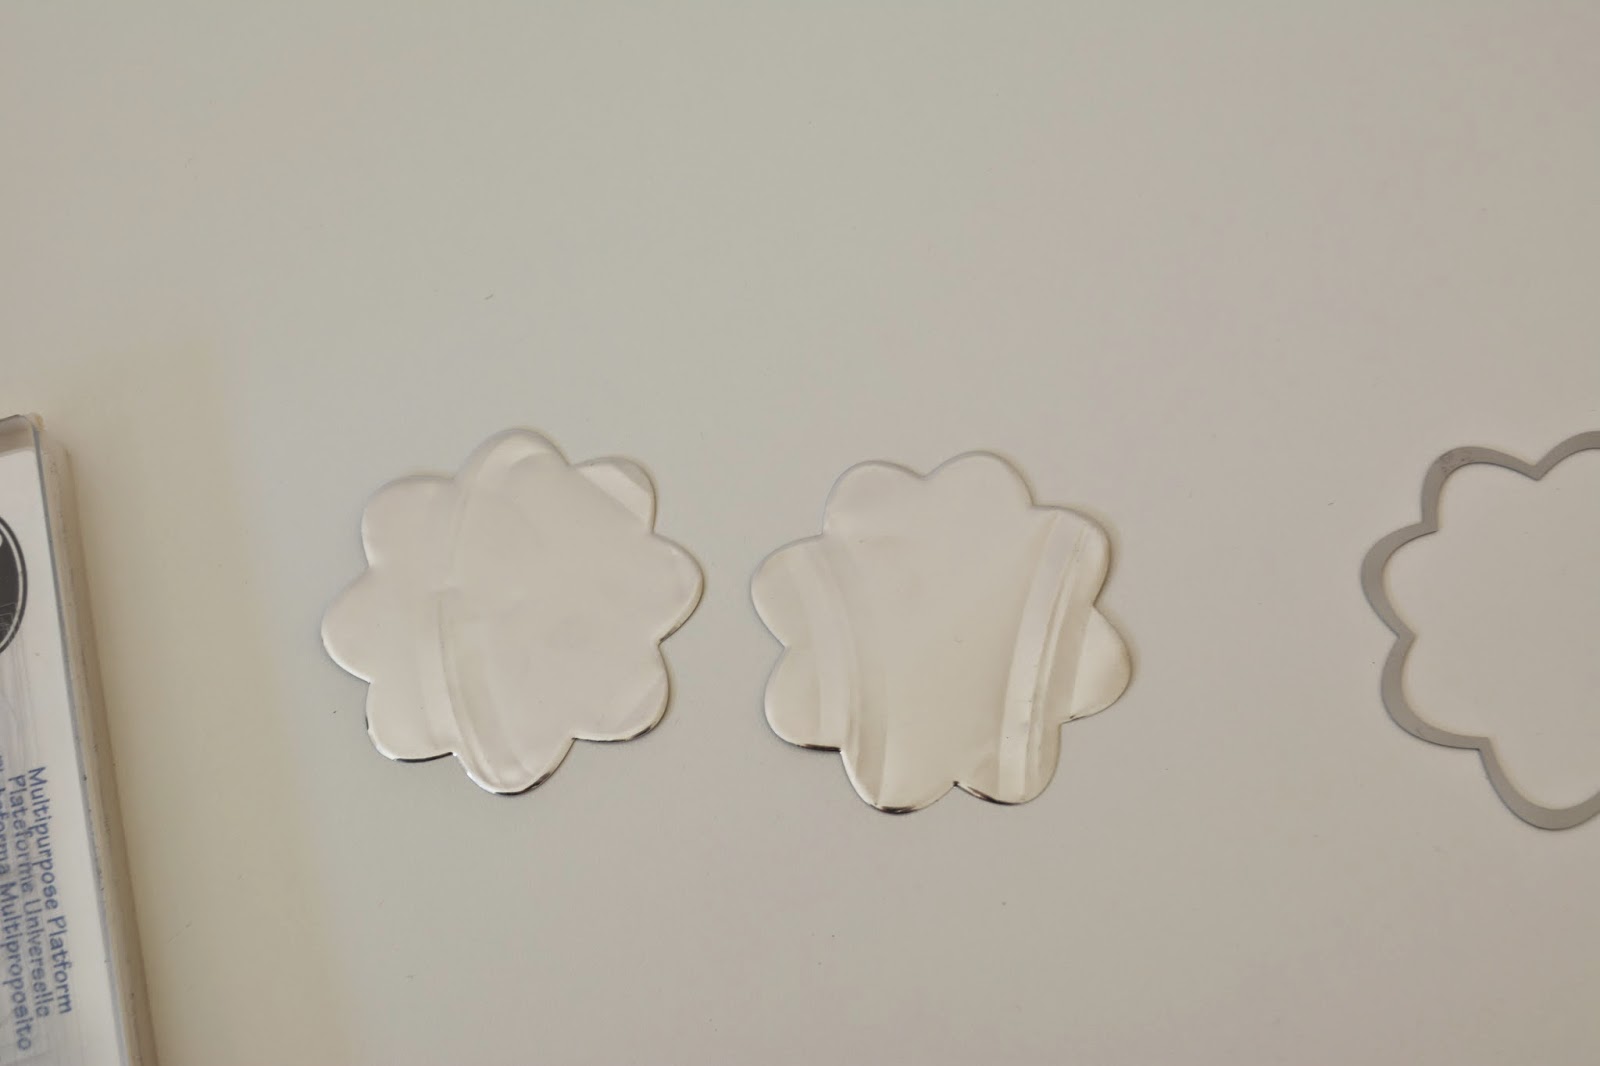
First cut two flowers from the foil.


Then using a dab of glue, glue the centre of the flowers together. Then I put the tea light in the middle and just started working the foil into petals using my fingers. It was just a little playing until I had the shape the way I liked it. This took less than 10 minutes to make, too easy.


Wait for dark and come on baby, light my fire...or tea light!


Isn't she pretty!

DIY Delight or Disaster? So loving this, delight all the way. I'm thinking next time I am going to emboss the flowers and paint them. Wouldn't they be perfect for Spring or Mothers Day?

Thanks for reading,

Mel xo

Monday, 21 April 2014

Thanks To My Thrifting Fairy Godmother

Howdy,

So I am back after what feels like ages! I really enjoyed spending the holidays with the kids and just taking a break from bloglandia. I love blogging, I do however find that it takes so much time that taking a break from my online life frees up loads of time to ensure I have an offline life as well. You know the whole Blog/Life balance. On the other hand I have BIG things to show you in the coming weeks.

Monday, 24 March 2014

Spice Rack Bead Organiser

G'day.

I rarely get to do a bit of thrifting, but lately I have been stalking every single one looking for spice racks. I've seen countless pictures on pinterest where spice racks have been used for craft supplies and since I use spice jars for my seed beads it got me thinking.


Then I stumbled across this little beauty for $2, so excited and I am pretty sure my parents had one of these back in the 80's.

Anyway as much as I love Masterfood's I was after a different look. So I broke out the chalk paint and painted her up.


After I painted I kept thinking it needed a graphic or something, but once I put the beads in I think they give her a little sparkle and I'm glad I didn't add any extra.


DIY Delight or Disaster? Well I think it's a delight and I like having the beads sparkling I'm all about seed beads, cheap but pretty.

Thanks for reading,

Mel xo

Thursday, 20 March 2014

Bejeweled Bread Box

Hey Peeps,

So in love with this I could seriously gush and swoon...but I'm not really the swooning type.


So about a year ago I posted that I had thrifted this bread box, but I had actually bought it in November 2012 and it promptly went into the garage much to Julian's horror. He loves when I bring things home and store it in the garage (yeah right!)


Anyway, continuing my chalk paint love I decided that I needed to paint her up. After I finished painting, I knew I was terrified of trying a transfer methond didn't want a graphic but she did need something. Anyway I had these ruby coloured glass knobs and I thought that would give her the vintage glam look that I wanted.


I LOVE it. I love how the glass reflects against the white wood, way better than the original wooden knob. I just think she is so pretty now, in fact too pretty to put ion my kitchen and have the kids maul her so I think she's going to stay in my craft room as storage, then again I may change my mind.


DIY Delight or Disaster? Oh she has delighted me more than words can say. This I have decided, is the look I want, white lots of white, white, with a little wood, bling and glass. It only took me a year and a half of blogging to find out what I like and I'm loving it, we have been doing some serious DIYing in the house. Oh man how I do LOVE Autumn! I'm loving red as an accent colour but I also love that I can swap it out any time I like.

Thanks for reading,

Mel xo


Monday, 10 March 2014

Entry Dresser ... Oh What A Difference Some Paint Can Make


Hey Guys,

So I have been working on the entry and I have to say I am loving the direction it's heading. So far less than $100 which is quite amazing. What I have really discovered, which won't be a big surprise to most of you, is what a huge difference some paint can make!

This piece was ready to go to the tip it was in terrible shape, but I convinced Jules that I could paint it and it would be fine. He might have implied that he's heard that before and how many years will it be until it's painted.


The baskets were in great shape so I took them out and gave it a couple of coats of chalk paint.

Brought it in and waxed it, I read you have to wait 30 days for it to be properly cured. So under the punishment of death I told the children NOT to even breathe in the same direction as it.

There she sits in my almost finished entry and no jokes I am so in love with it. Seriously I blog and stuff, to keep the membership you never throw anything away, and I am thrilled that I didn't.


DIY Delight or Disaster? Come on, she's looking mighty fine!! Delight.

Have you saved anything recently from anyone you know lately?

Thanks for reading,

Mel xo

Thursday, 16 January 2014

My favorite Trash Chic Posts of 2013

Yep still recapping, actually I'm on holidays and Summer is hot so while the kids are off school I am being a little lazy. Here are my favourite upcycled posts of 2013

Formula tins to laundry Canisters, of i love these and I use them every day!


The ear bud key chains, which the kids used for coins as well as their ear buds.


These Gamer book ends, about the only thing I did in the boys room, other than their doors which they really liked.


The Santa Boots which I truly adore!


The Stacking Cans which the kids absolutely loved!


These are my favourite necklaces and earring sets and the fact they were made for free makes them even better!


This turned out to be the handiest item for my knitting. Love it, Think I need another for when I am using multiple colours.


My first time using chalk paint and I love this for my vinyl!


This upcycled crib rack was just what I needed to complete my craft room.


Last but not least my gorgeous Max in his DIY iPhone costume.


Looking forward to turning more trash into treasure this year!

Thanks for reading,

Mel xo

Thursday, 19 December 2013

Snow Man Candy Jar

Hi Guys,

Thanks to the lovely Emily at Nap-Time Creations, I'm joining up with a bunch of lovely and talented ladies to bring you a A Crafty Christmas.


I love a good "trash chic" project and Christmas seems to bring it out of me, so I thought why not try and do another trash chic week but make it completely Christmas themed. Let's be honest no matter how many hand made gifts you make Christmas is the one time our hands seem to be forever in our pockets!

This Snow Man candy jar cost me $0 the perfect price (if you don't include the actual candy)


Thursday, 7 November 2013

DIY Iphone Costume

Okay, so picture this, 18 hours before it's needed I suddenly am alerted to the fact that Max needs a costume for daycare.

I have never really done a costume before but I didn't want him to miss out, so I turned to Pinterest and found a few costumes for ipods made out of boxes.

Thinking I was so original I decided to do an iphone one, ummm go google that and see exactly how "original" I was.


Tuesday, 8 October 2013

Wine Rack to Vinyl Storage

 Hey Guys,

I think Spring has given me back my desire to get back into doing the house, maybe it's the warmer weather but I have been working my butt off. This trash chic project has me happier than a pig in mud!


If you've been hanging about the mansion for sometime now, you may remember that I got this wine rack, oh only about 11 months ago, and for 11 months Julian has wondered why it has taken up space in the garage. He thought I was going to use it for actual wine, but I cleared that up by saying as if I would be able to keep wine on a rack just to look at!


Maureen at It's All Connected had emailed me her recipe for homemade chalk paint ages ago and I have been between, desperate to try it and scared out of my wits that I would ruin my furniture so I though this was the perfect item to start with. When the first coat dried, I considered deleting my blog and sending hate mail to anyone posting chalk paint makeovers...it looked dreadful!


But I put my fears out there at the Mellywood's Mansion Facebook Community, I've been dying to use that term and make don't I sound special! Anyway my mates on my Facebook page (and you can follow me here) assured me that it was normal and just to keep going, and I'm so glad I did!


Three coats and some waxing later, I am in LOVE!!!

DIY Delight or Disaster? Okay so totally honest, I really thought I was going to hate it but when it was finished and I put my vinyl in it, I looked around my almost completed room and literally got all choked up (No Mum relax, I'm not pregnant, sometimes I have some real emotions!) Delight!

What's made you cry tears of joy?

Mel xo


Tuesday, 1 October 2013

Crib Upcycle

Don't you love when people look at you as you grab "rubbish" from the side of the road? I wish they could all see the finished project and know I am not mad, then again, they might start picking at the hard rubbish and that wouldn't do! I rescued (insert Jule's eye roll) 2 cot or crib as you may call them sides.


Here's why I get the eye roll, I took them and put them in the garage, much to Julian's horror there I left them. I knew I wanted to do something but what?


So (two years later) I was poking about in the garage and saw it there and decided a couple of coats of paint would do the trick and screwed it to the wall in the craft room.


I was looking for some little buckets but then I found these square ones which I like better, I put dots on them to match the other polka dot things but they just looked like they had a case of the measles.

So I put chalk board labels on them, although for some reason haven't got around to writing on them.


DIY Delight or Disaster? I see that eye roll and raise an organizing centre for my craft room, which I love, Delight!

Thanks for reading,

Mel xo


Monday, 23 September 2013

A Yarn Keeper

What every knitter or crocheter needs!


I think it's probably obvious by now that I love to knit, however knitting with toddlers is pure hell. Max loves the yarn and throws it about like a cat. It tangles up at best, at worst he gets the yarn all sticky, so I was going to buy one of these yarn holder keeper things, I saw them priced at $20 and I thought, no I think I can probably make something.

Supplies:
Large Empty Tin (I used a formula can)
Fabric
Trim
Eyelet, grommit thingy (only tech terms here peeps)
Xyron Sticker Maker - click link to read more


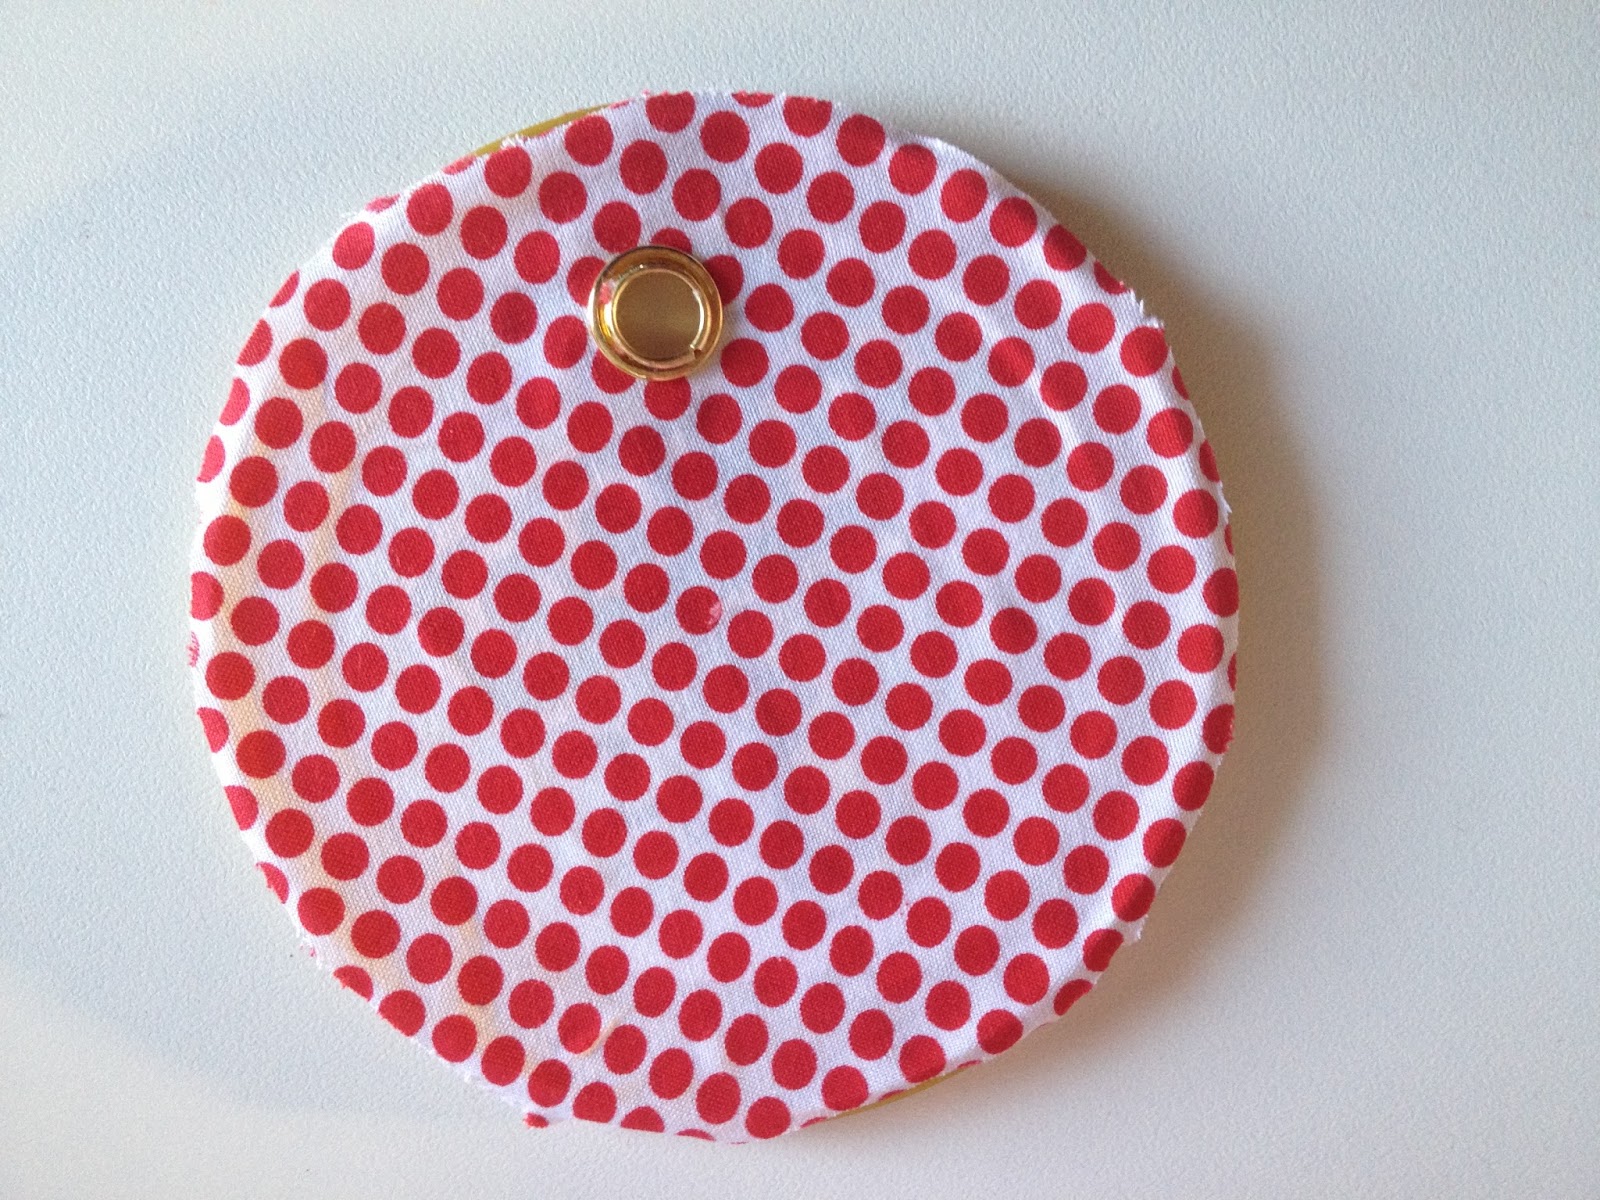
First I made the fabric & trim into a sticker, I'm telling you I love this Xyron Sticker Maker


Then stuck them on the tin.


And the lid, then I put the eyelet grommet thing in

Of course I did it upside down....Dang!!

Popped the wool in


Start Knitting, without the ball of wool flying all over the floor!

DIY Delight or Disaster? Man it's awesome, I made it for free saving $20 and it has stopped Max from destroying my wool. Delight!! Also my lot are on school holidays for the next two weeks and we plan on enjoying the sunshine. So apologies in advance if I am a little late in responding to email, but I'm about to get my Spring on!!

Tomorrow I will show you what I have been knitting with that pink wool, stay tuned!

Thanks for reading,

Mel xo

Be Delighted Every Day, Follow Mellywood's Mansion!
project-name-for-SEO-purposes-here

Related Posts Plugin for WordPress, Blogger...